
During the first week of this course, part of the assignment was doing the Design Thinking Virtual Crash Course, designed for Stanford’s D.school. During the course of this project, we went through the 5 stages of design thinking: Empathize, Define, Ideate, Prototype, and Test. We were partnered with another fellow student from our course and went through these steps to redesign the gift giving experience. My project partner’s name is Kimberly. The process was documented so that we could see it from start to finish, and this was a great exercise to jump start Design Thinking as we start the course. My first task was to empathize by getting to know her ideas, and expectations of the gift giving process.
You can download the worksheet for this assignment here:
Step 1: Empathize
By interviewing Kimberly, I was able to get a general sense of how she viewed the gift giving process; what about it was important to her, how she felt about gift giving, and what she wanted to accomplish by doing so. It allowed me to pick the most prominent points for later on in the process where those points could be used to create a new way of gift giving.
Step 2: Define the problem
So now that I had all the baseline information noted and received valuable information as to where her mind was in the process, I was able to come up with a problem statement, which could then be used as part of the objective in redefining the gift giving process. In this case, time was the main issue, and there were several alternatives that I thought of that I could then use during the ideation stage of the design thinking process.
Step 3: Ideate
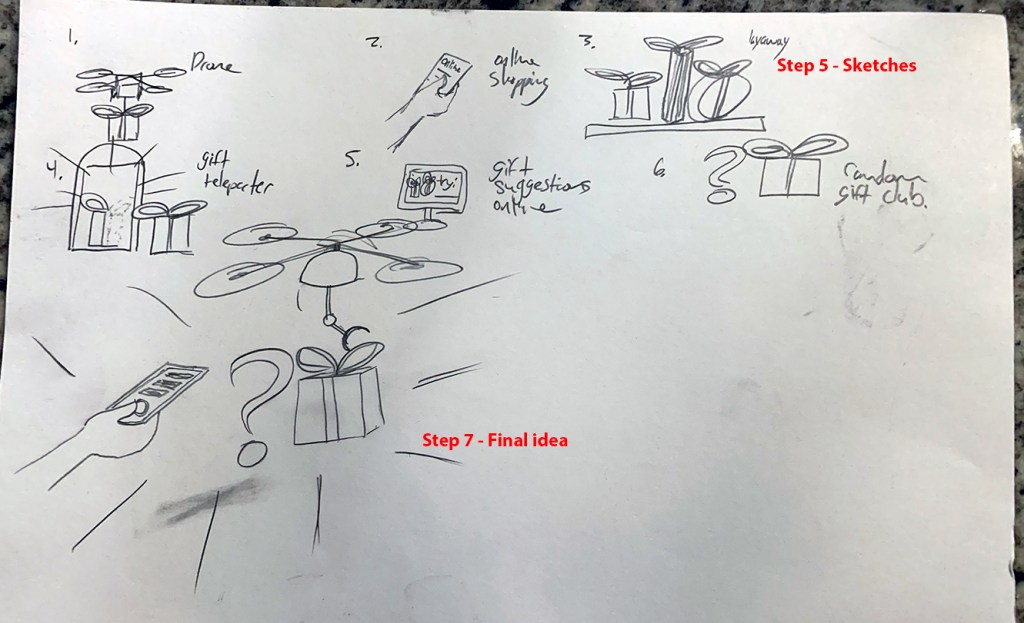
In This part of the process, I came up with 6 sketches for ideas to mitigate the problem she was having with the gift giving process. We were told to think outside of the box and be imaginative, so some of these solutions were less practical than others but the idea was to get your imagination to expand and think as much as you can as to what could become a good solution.
I drew everything from a drone delivery service, to a teleportation device, to an online randomized gift subscription program that covers all holidays. It was an interesting way of unleashing my creativity.
Step 4: Prototype
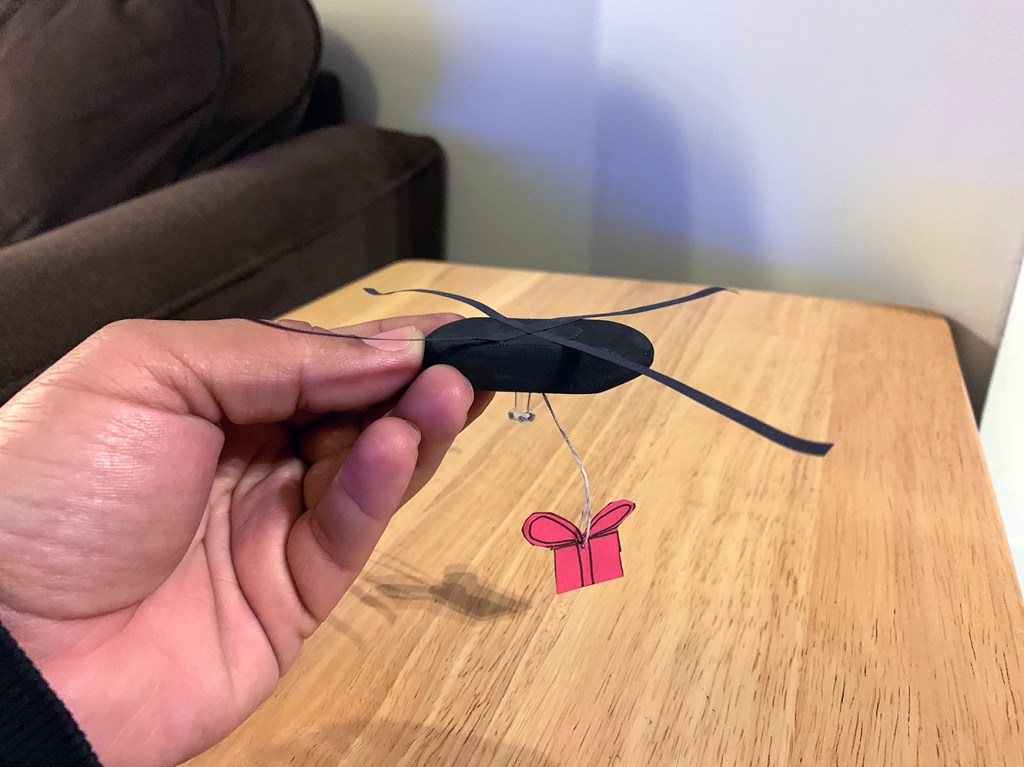
This was the most interesting part of the process for me. We were given 10 min. to use whatever tools we had at our disposal to create a physical prototype of our main solution. It was difficult to do, but once the time started, all my brain worried about was getting it done. I ended up building a mix of 2 sketches I consolidated in step 7: a drone delivery service, that was linked to a “random gift club” online subscription service that worked based on custom user input using an app.
I used any tool at my disposal and ended up with a prototype made from an eraser, construction paper, dental floss, and glue sticks. Amazing.
Step 5: Test
When it was all said and done, she enjoyed learning about and seeing my solution in prototype form. I gathered more information about the prototype and what could be done to expand its capabilities, or more practical ideas that could be incorporated into the final version.
What I have learned
It was a great learning experience to not only read about design thinking, but to put it into practical use. Having a set formula and process to go off of makes it easier to learn and use design thinking in my own work going forward. I believe this is crucial for any type of designer to understand, especially in the UX field were digital products and their requirements are constantly changing. This requires getting into a certain mindset and design thinking is the perfect way to describe what that mindset should be to create evolving products.
